Apple has released the Mac OS X Lion USB Drive, but I doubt it’ll be a hit for $69. Ouch. If you have already bought (and upgraded to) the Lion, you can create your own Mac OS X Lion Install drive using any spare 4.3Gb+ (8Gb to be safe) USB thumb drive. Here is how.
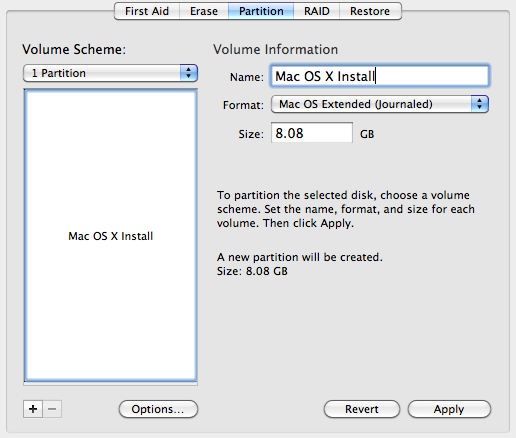
Insert your USB drive into a USB port, and launch the Disk Utility. Click your USB drive in the drive list at the left, and select the Partition tab. Change the volume name to Mac OS X Install.
Update: You can have more than one partition on your target disk with this method. InstallESD.dmg requires a 4.3 Gb partition as the minimum. This allows you to split your USB drive and use the second partition for your other files and documents and still be able to boot and install Mac OS X Lion from it.
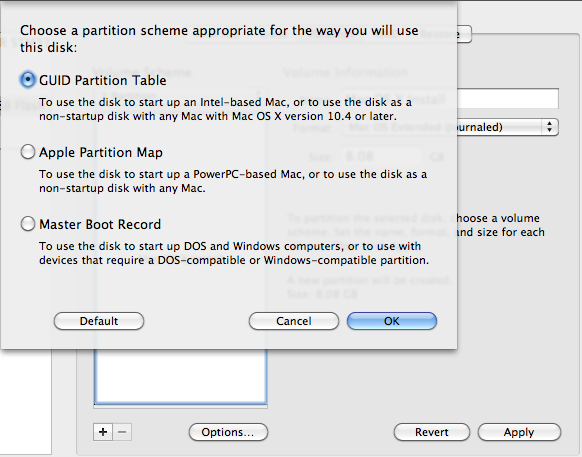
Make sure the partition scheme selected is GUID Partition Table, you can check this by clicking the Options… button below the partition map.
Click OK / Apply to partition and erase your USB drive.
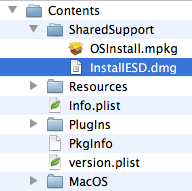
After the USB drive is ready, go to the Applications folder, find the Install Mac OS X Lion application you have bought from the AppStore, right click it and select the Show Package Contents option.
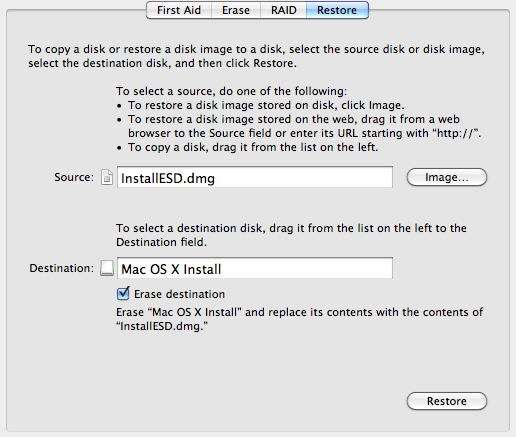
Back in the Disk Utility, select the Restore tab, then drag and drop the InstallESD.dmg file from the Contents/SharedSupport folder into the Source input field.
Next drag your newly formated USB drive’s only volume to the Destination field. This is how it should look like:
Click the Restore button and go grab a cup of coffee, this should take a while. When it completes, you’ll have your own Mac OS X Lion Install USB thumb drive.
But wait, there is something missing…
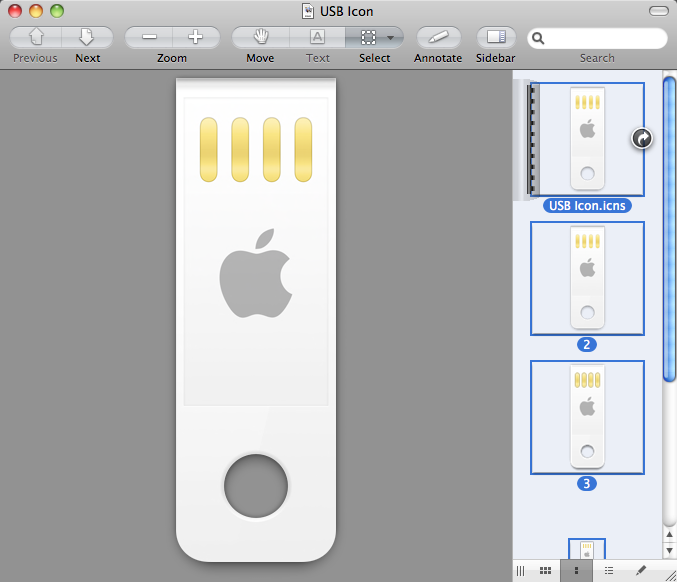
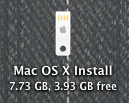
That’s right, the drive icon. Download this zip, uncompress it and open the icon file in the Preview, then press ⌘A to select all the sizes and hit ⌘C to Copy them.
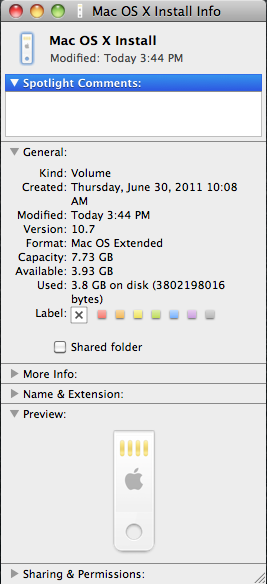
Now select your newly made USB drive, hit Command-I to Get Info, click the generic icon to select it and press ⌘V to overwrite it with the Apple version.
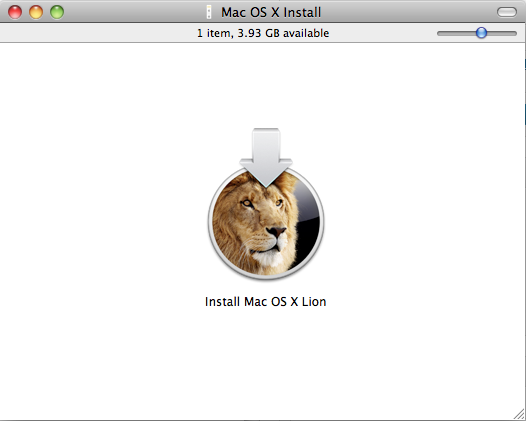
The original USB drive sold by Apple has only a single file, the Install Mac OS X Lion app visible when you open the drive:
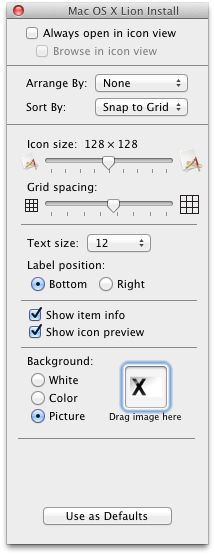
We are only missing the original background now, so hit Command-J to open the window settings, select Image as the background option, and drag the MacOSX_Media_Background.png file into the picture picker next to the background options.
Adjust the file icon size to your preferred one, I chose 128×128 myself. Open the Terminal, and type the following commands to hide the rest of the files in the USB drive’s root folder:
cd "/Volumes/Mac OS X Install/"
sudo chflags hidden Library Packages private System *.png
That’s it! Enjoy your Mac OS X Lion Install USB drive.



Excellent guide and thank you for the icons!
I will soon be a new Mac Mini 2011 baseline model user. I would like to know whether there is a InstallESD.dmg file in my restore partition.
Thanks.
The restore partition is a ~650mbyte partition, and it doesn’t include the InstallESD.dmg. You’ll have to download the Lion Installer from AppStore – it should be free for you – AppStore will validate your computer based on your Apple ID, the model and the serial number and show it as purchased.
Great post, especially the Lion USB install icons! You rock!
Must agree with the others – this is a thorough and accurate walk-thru. Thanks a million!
This may be a lame question but which Terminal? In the Lion install app package on my computer or the thumb drive? When I open the app Terminal it starts linking up and asking me if I will let it go to Apple. (I run Little Snitch).
BTW, great and clear instructions otherwise!
Thanks,
There is only one Terminal available universally, and it doesn’t matter where or when you do the commands in the last paragraph – they’re just cosmetical ones. You enter them to hide the extra and irrelevant files and directories on the thumb drive.
Thanks for the detailed guide!
Note that the file “MacOSX_Media_Background.png” was probably intended to be used as background (just a guess, I never had a original install USB drive in hands). So you may want to ⌘J and drag it there after selecting image as background.
The result is pretty convincing 🙂
Thanks for the tip! I’ll add your suggestion to the guide.